Perspective, teens and adults
How to draw A Room in One-Point
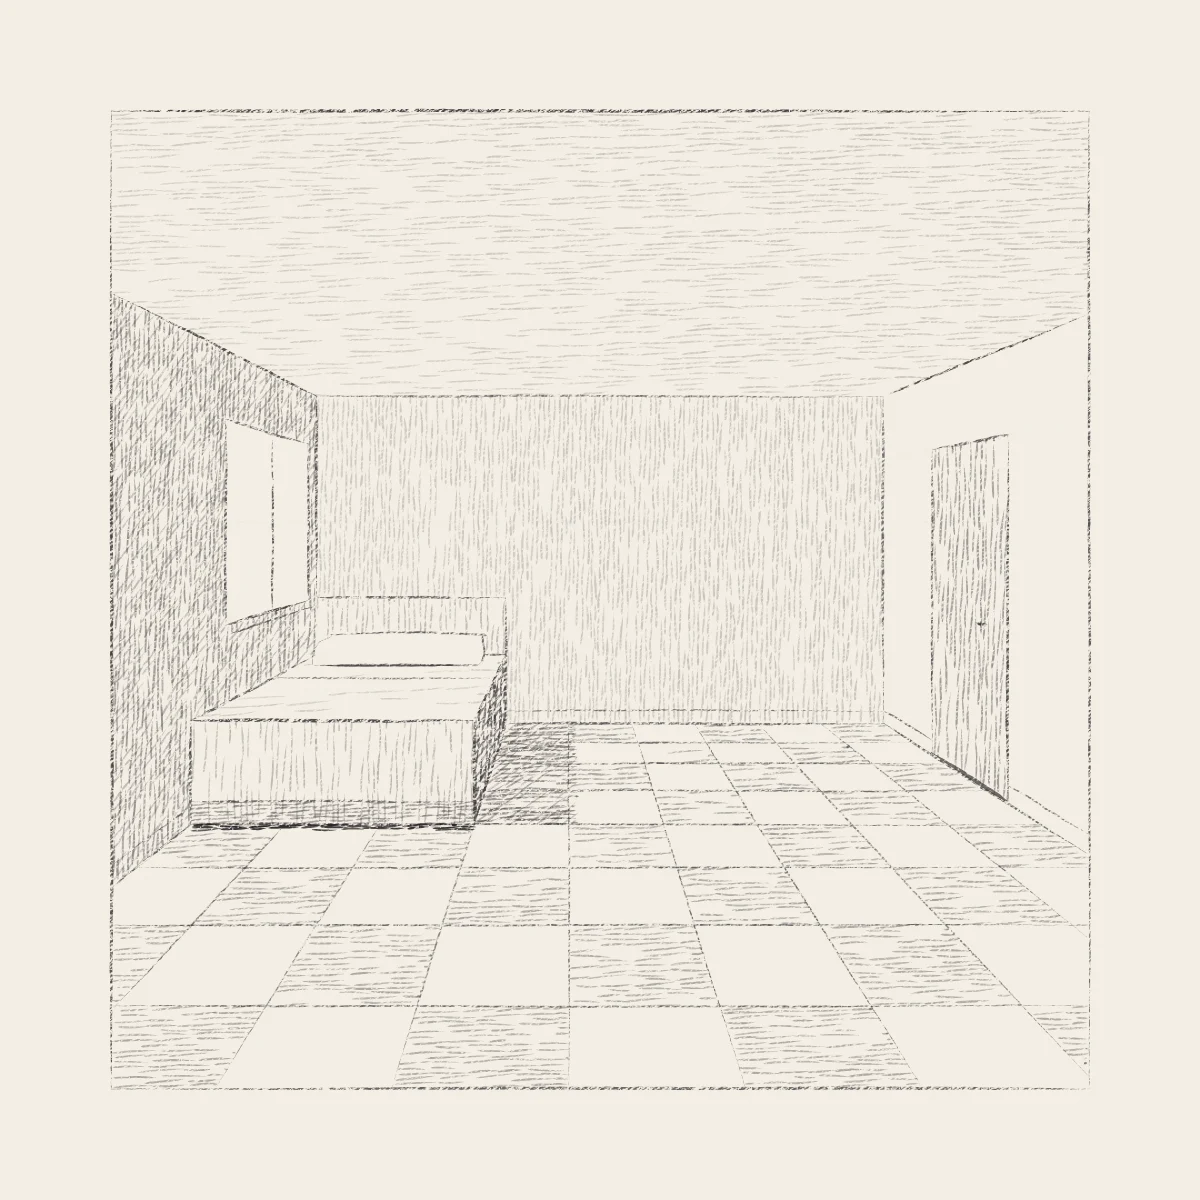
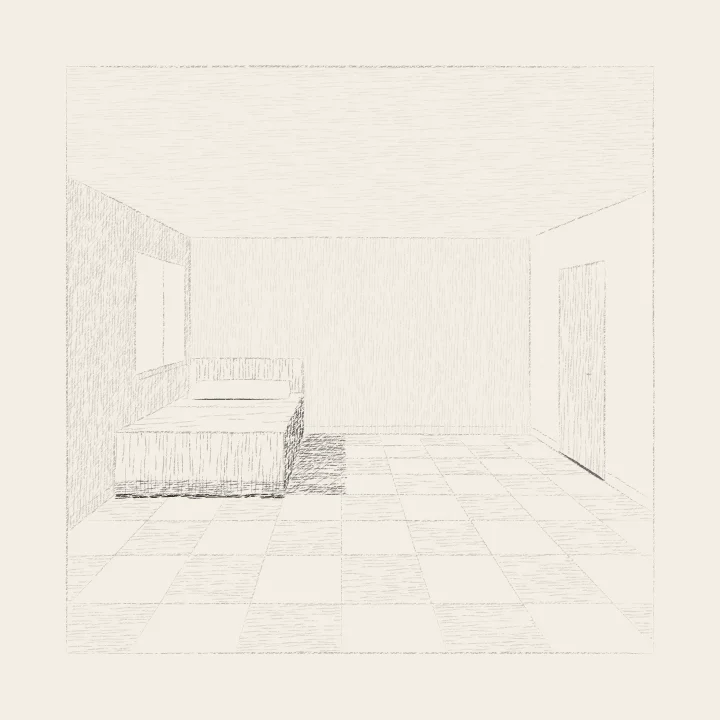
Set the horizon at your standing eye level and put one vanishing point on it. Draw the back wall true, run the room’s corners to the point, space a tiled floor with a single diagonal, carry heights along the walls for a window and a door, and stand a bed on the tiles. Then give every plane its own value, lit from the window.
No account needed to try it.
- Level
- Easy
- Time
- 45 minutes
- Steps
- 8
- Ages
- 13 and up
How to draw A Room in One-Point
What you need
- Drawing paper Cartridge or sketch paper with a little tooth.
- Blue pencil A light blue col-erase pencil, or a very light HB.
- Graphite pencils HB and 2B; a 4B or 6B for the darkest darks.
- Kneaded eraser Press and lift; pinch it to a point for highlights.
- Sharpener A sharp point makes cleaner hatching.
Step by step
-
 01
01Placement
The frame and your eye level
Draw the frame of your picture. Then the horizon at your eye level, and one vanishing point on it, straight ahead of you.
-
 02
02Big shapes
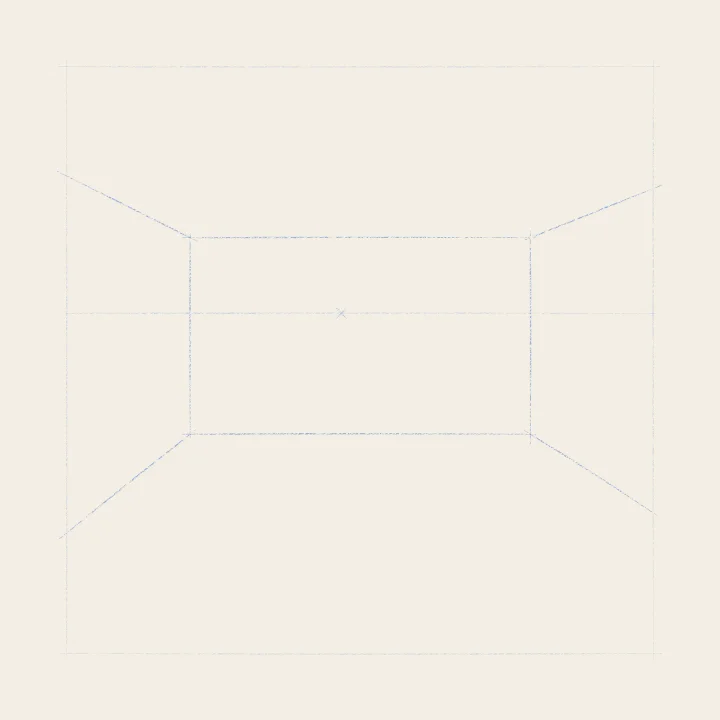
The back wall and the corners
The back wall faces you: draw it as a true rectangle. Then run the room’s four corners from the vanishing point to the frame.
-
 03
03Construction
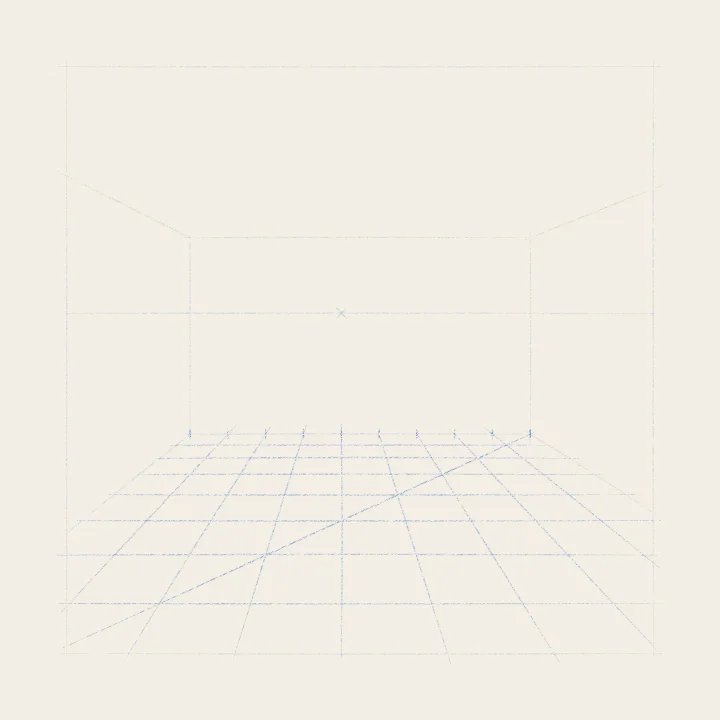
Tile the floor with one diagonal
Tick equal widths along the back wall’s base and run lines from the vanishing point through them. One diagonal then spaces every row.
-
 04
04Construction
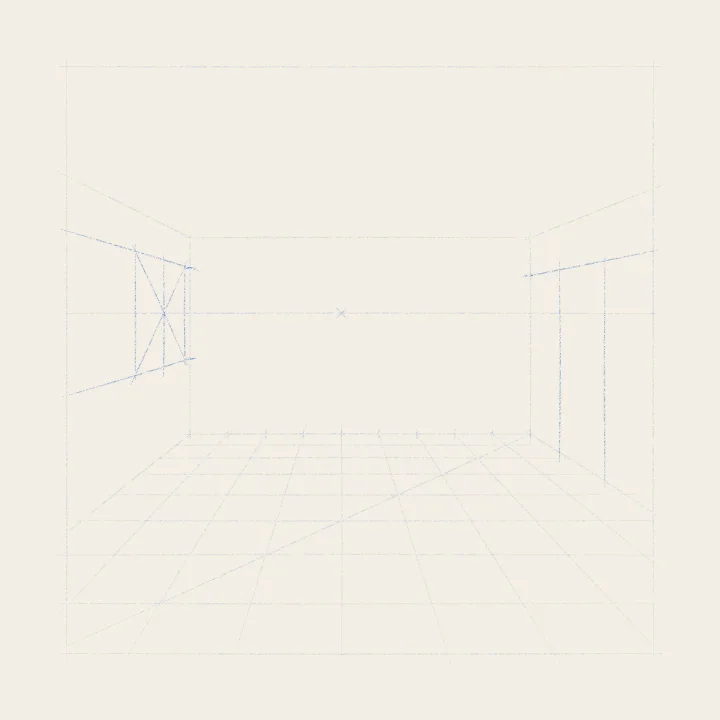
Heights along the walls
Measure heights on the back wall’s corners and carry them forward along lines to the vanishing point. The window’s diagonals find its centre.
-
 05
05Construction
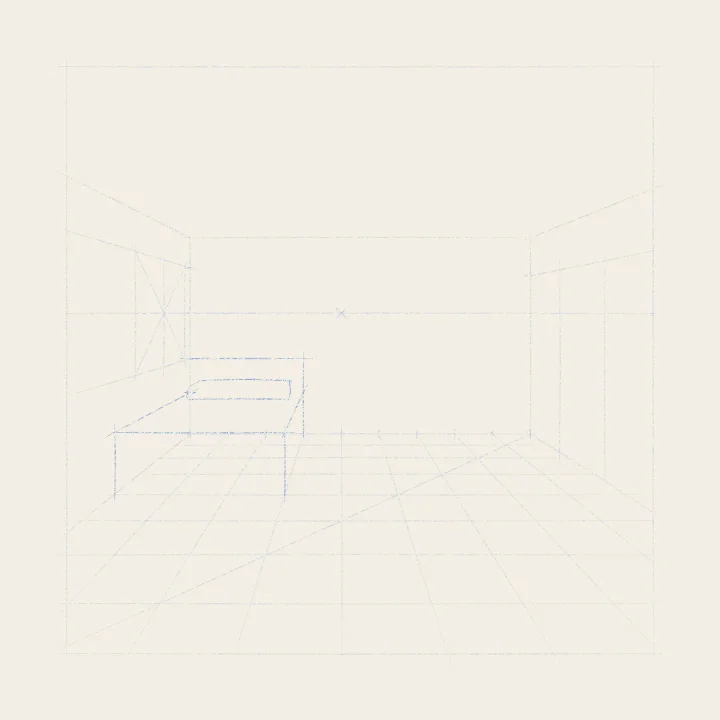
The bed is a box
Count tiles for the bed’s footprint: three across, four back. Its foot faces you, drawn true; its long edges run to the vanishing point.
-
 06
06Construction
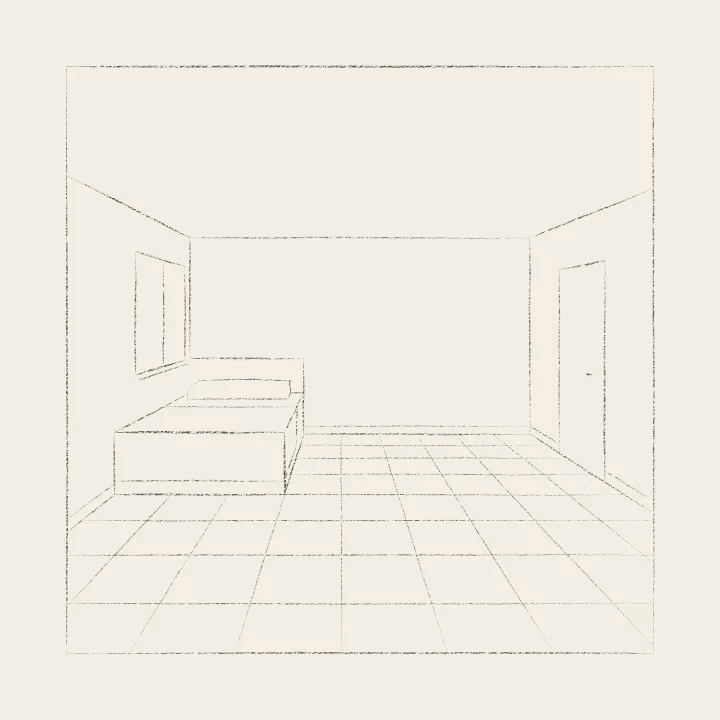
Commit the lines, lift the blue
Now graphite, corner to corner: the nearest edges firmest, the back wall lighter, the tiles faint. Then lift every blue line.
-
 07
07Light and shadow
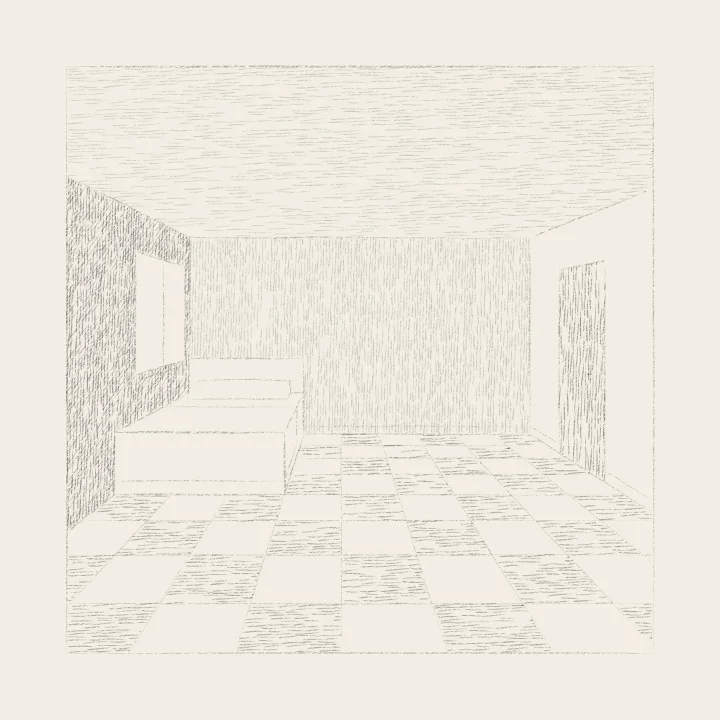
A value for every plane
Light comes from the window on the left. Give each plane its own value: the window wall darkest, the wall facing the window lightest.
-
 08
08Light and shadow
The bed and its shadow
The bed’s side turns away from the window and goes dark. Its shadow falls right, its long edge running to the vanishing point.
Teens and adults